Lab 8 Standard Switches
This lab is about,
- View the Current Standard Switch Configuration
- Create a Standard Switch with a Virtual Machine Port Group
- Attach Your Virtual Machine to a New Virtual Machine Port Group
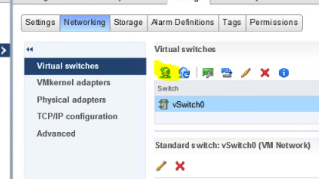
View the current switches
Log into the vCenter Server and go to your host.
Click the host and select Networking tab from right hand side.
Create a Standard Switch with a Virtual Machine Port Group
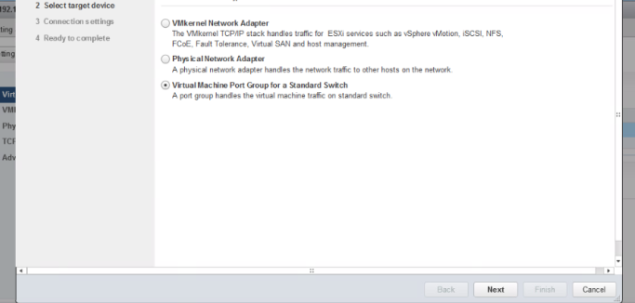
Now we are going to add a switch. To do hat click on the network globe icon. When you click it you will get a new pop-up window with the wizard.
Select the network type from there.
Select “Virtual Machine Port Group for a Standard Switch”
Click Next.
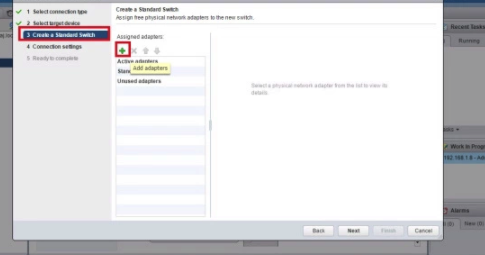
In the next step select “New Standard Switch”
Click Next
Next step is to create standard switch. To do that click the plus mark to add.
From the list down select active physical adapter.
Click OK
Click Next
In the connection settings put the connection type name as you wish to have.
Keep default for VLAN ID.
Click Next.
Click Finish.
After you added the connection you can see its connected now.

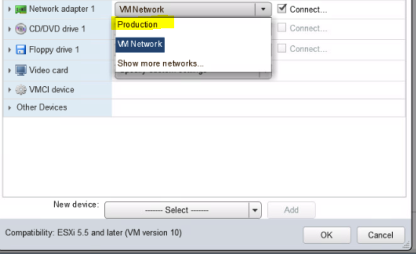
Task 3: Attach Your Virtual Machine to a New Virtual Machine Port Group
Go to your virtual machine and right click on it and click edit settings.
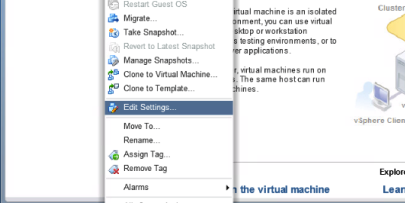
In the settings select network adapter and choose the adapter we just created. Mine is called production.
Select it and click OK.
Power on your virtual machine and check whether its working properly with assigned network.
End of this post
Thank you.
