Lab 5: Adding EC2 Virtual Machines and Deploying the Web App
In the lab 5 we are creating the IAM role for the use of web server and then I am going to launch two EC2 instances for web server and queue server. End of this lab I am going to transfer my web application to AWS instance and run it on cloud server.
Lets start.
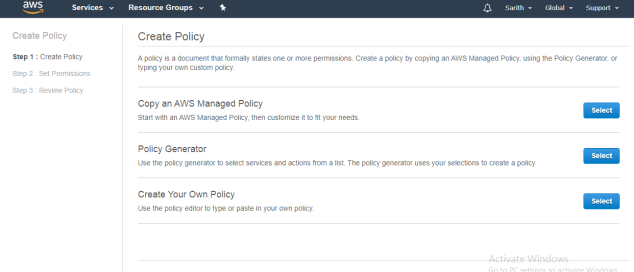
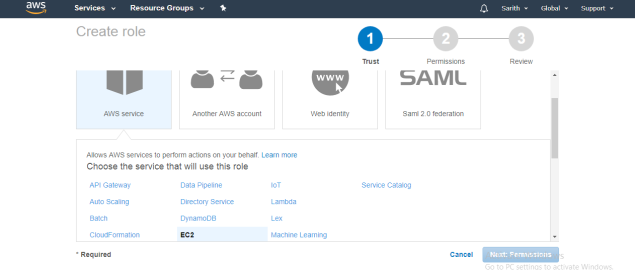
We want to create roles that access to other Amazon services so that applications running on EC2 instances don’t have to have credentials baked into the code.
Go to the IAM from AWS services and click policies from left pane and click policy generator.
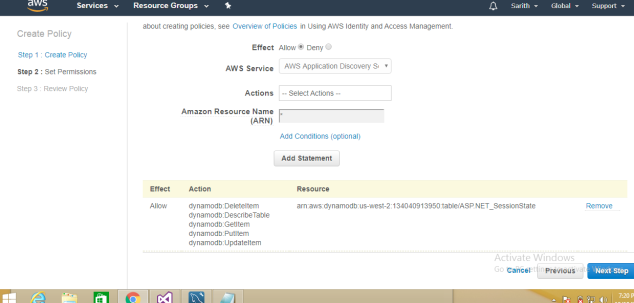
Im creating a policy using following information.
Effect: Allow
AWS Service: Amazon DynamoDB
Actions: DeleteItem, DescribeTable, GetItem,PutItem,UpdateItem
Click Add statement
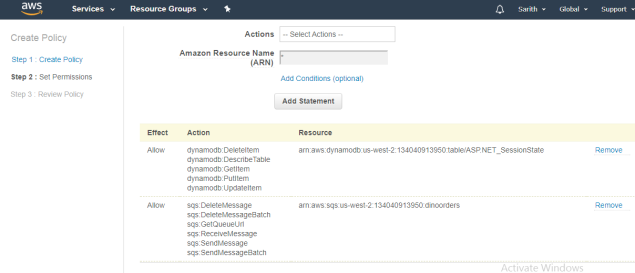
Second policy,
Effect:Allow
AWS Service: Amazon SQS
Actions: DeleteMessage, DeleteMessageBatch,GetQueueUrl, SendMessage, SendMessageBatch
Click Add statement and Click Next Step
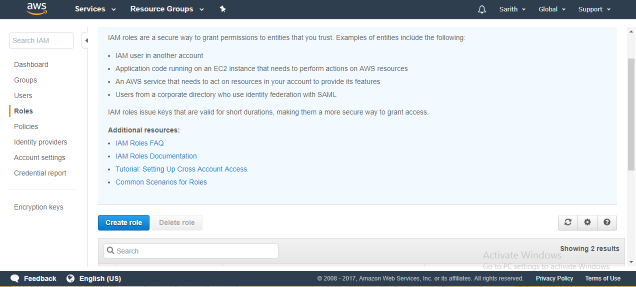
From the next step I am creating the IAM role.
Click Create Role
Select AWS Service and then click EC2
Click Next
Next step is to add permissions to the role.
Select it and click Next.

As I mentioned earlier in the post we need two servers to run web server and queue server. Now we will install those two servers here.
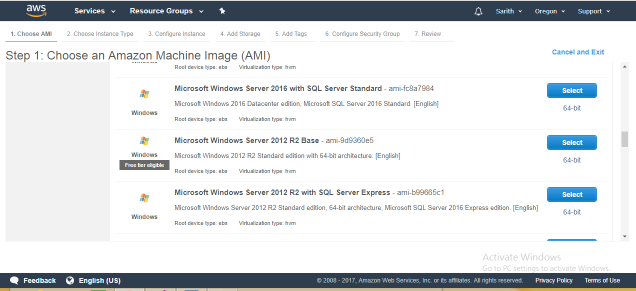
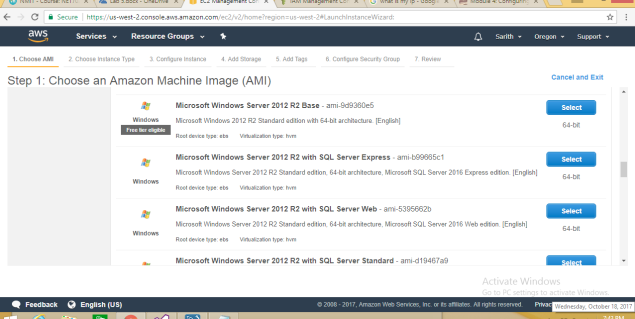
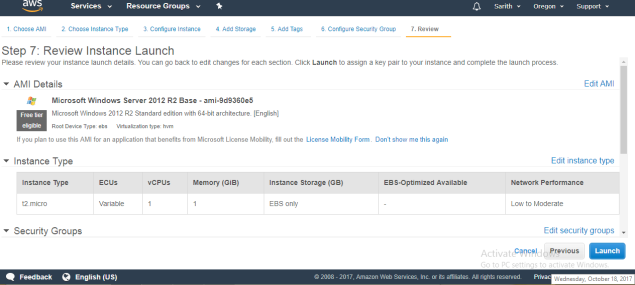
Go to AWS EC2 and select create instance.
Select the EC2 AMI as Microsoft Windows Sever 2012 R2 (Free tier)
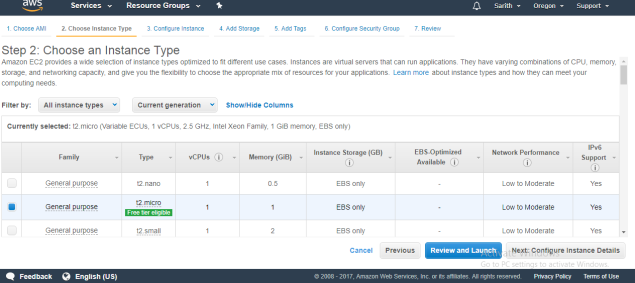
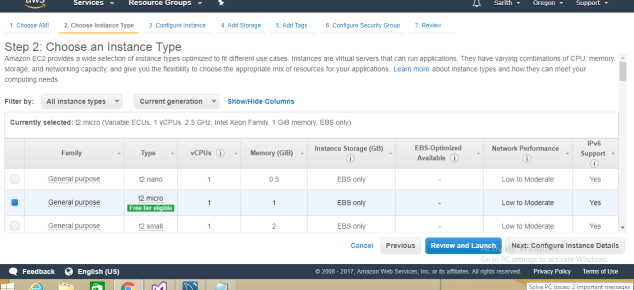
Select t2.micro and click next
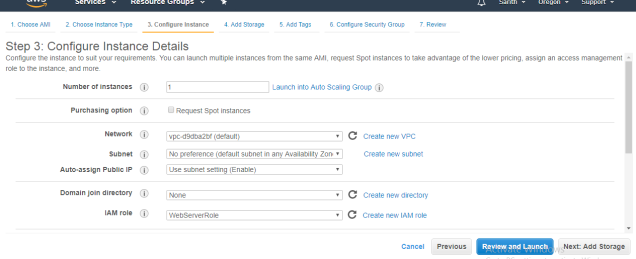
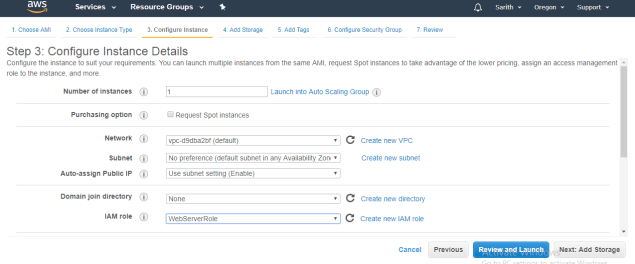
Here, I am selecting the role we have created earlier.
Then click Next
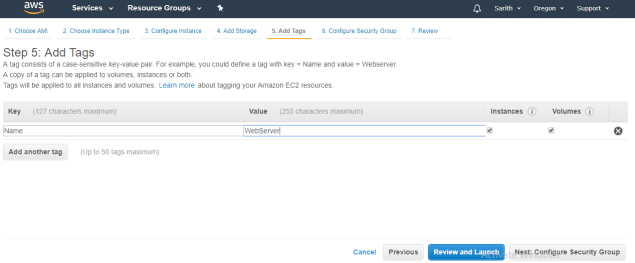
I am adding a tag as a name.
Click Next
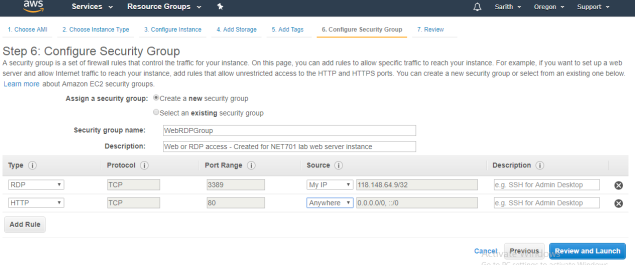
Select create new security group.
In here after the RDP protocol I am adding HTTP and select the source as anywhere.
Click Review and Launch.
Now I am creating the Queue server.
Select the Windows Server 2012 R2 (Free tier)
Select t2.micro as the instance type
Click next
Select IAM role as “WebServerRole”
Click next
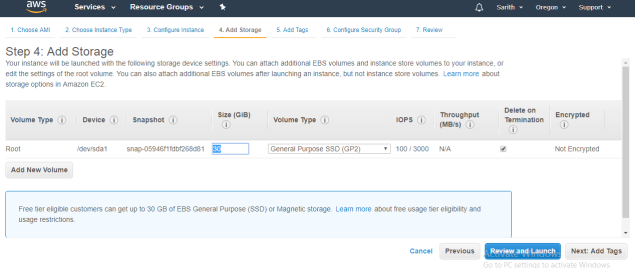
Leaving the default storage and click next
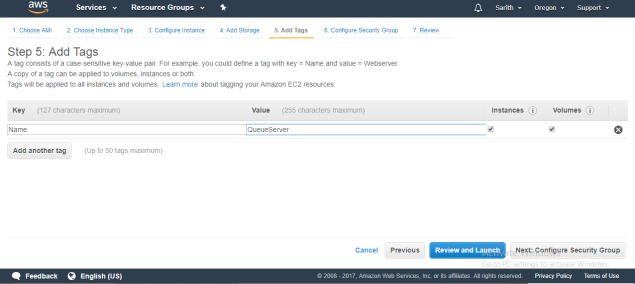
I am adding a tag here as a name.
Click Next
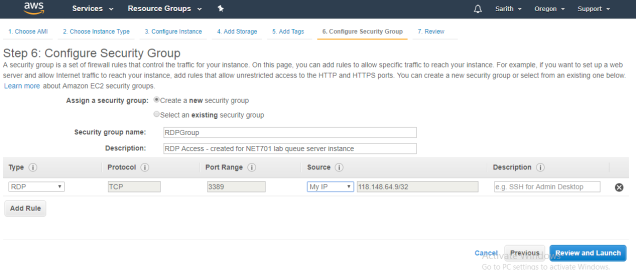
I am creating a new security group here and click Next
Click Launch
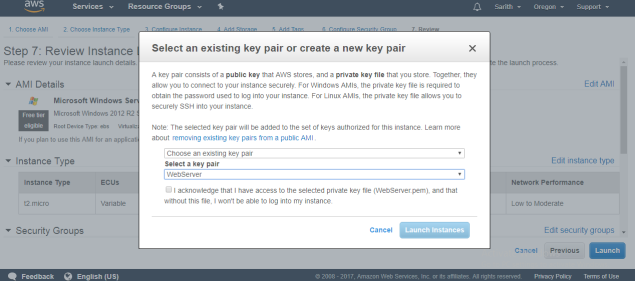
From key pair windows I am creating a new key that I can use for both servers.
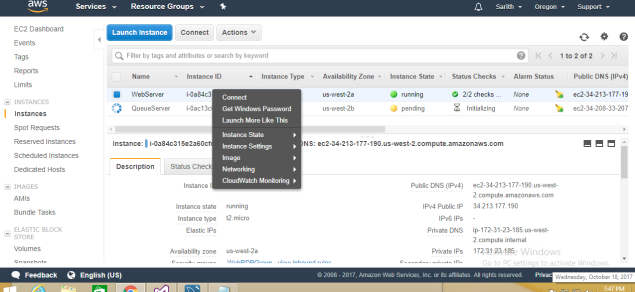
You can see one instance is already created and one other is pending.
Right click on the WebServer and click Connect
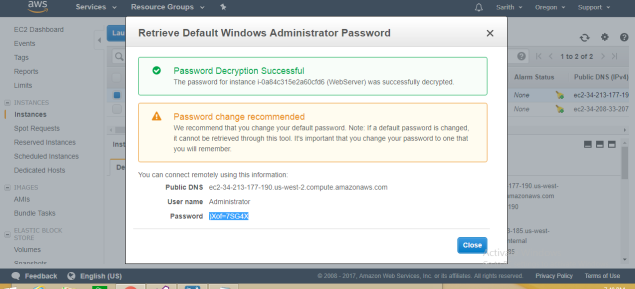
Here I am uploading my key pair key and getting the password for the instance.
Next thing is. I have to run IIS on the server to deploy my web application.
To do that I am installing IIS using the Active Directory features.
Click Add roles and features in server dashboard and click Next
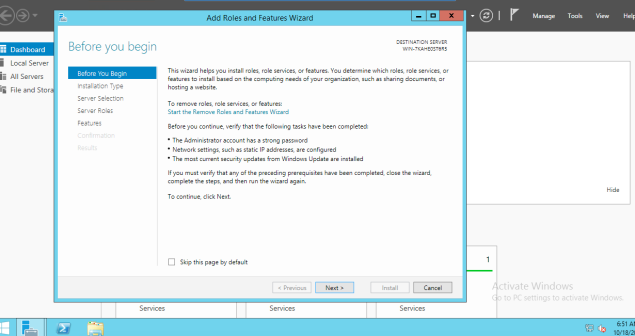
Select Role-Based or Features based installation
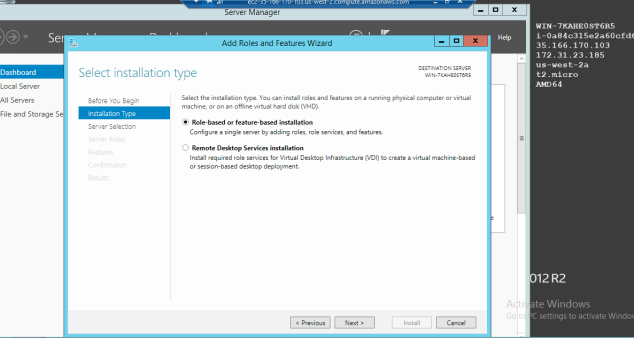
Click Next
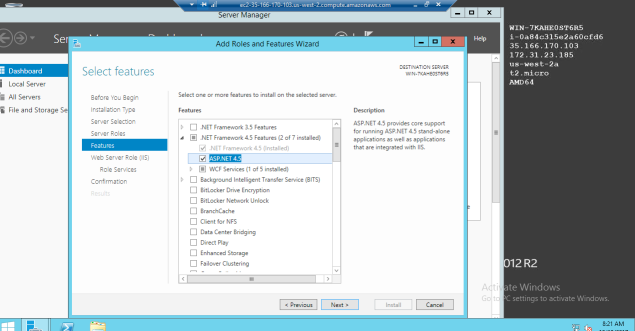
In the server roles list, Scroll down and find Web Server (IIS) Select it and click next.
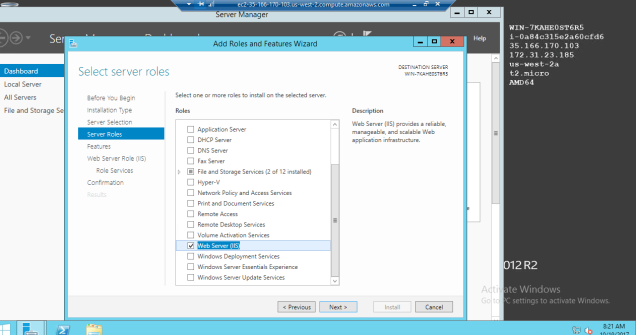
In the features list I am going to install ASP.NET 4.5. This web application developed using ASP.NET and we need ASP.NET feature in the server.
Click Next
From the Role Services list I am selecting Windows Authentication option.
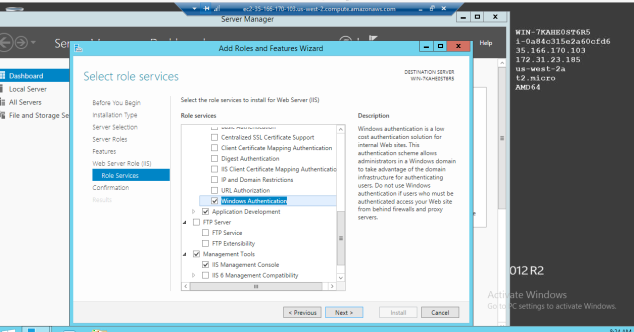
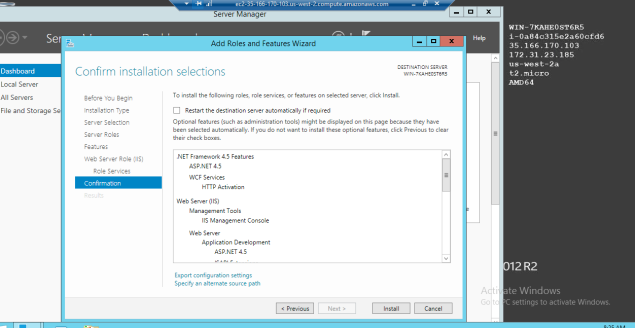
Review all the details and click Install
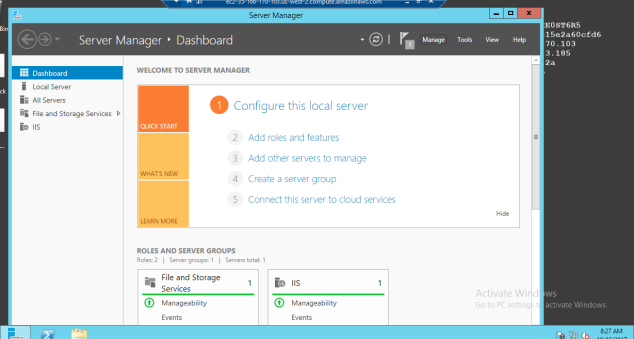
Here you can see my IIS is installed and running perfectly
Now I have to move my web application to my newly install Windows Server instances. Till now my web application runs on the localhost. So now I am moving it to cloud.
Right click on the NET702.DinoStore project that is opened in the Visual Studio.
In the list down menu click Publish
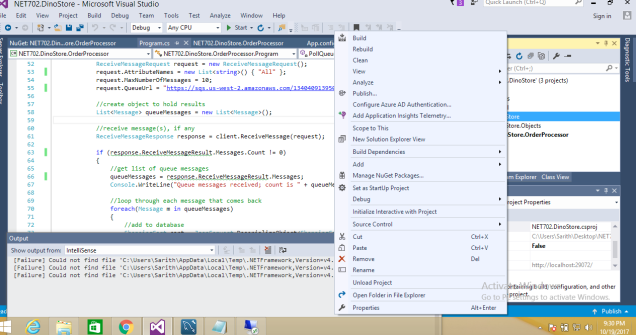
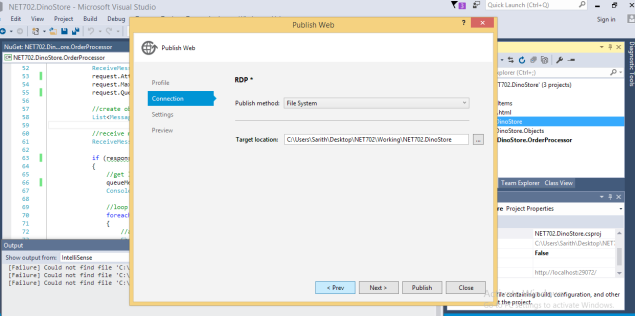
Published Method : File System,
Name : RDP
Target Location : Saving location (Local)
Click Next
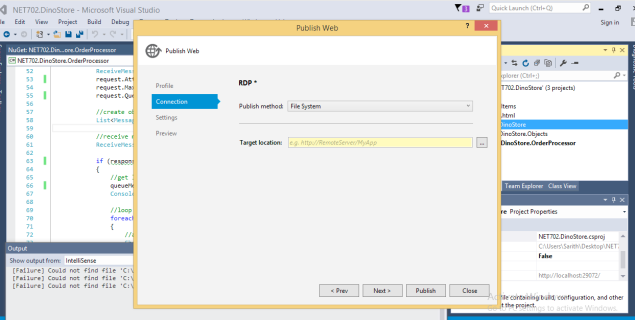
Select Publish
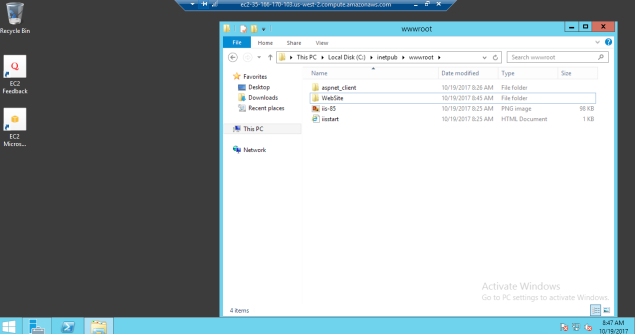
After web application is successfully published to the folder you have selected, we have to move that to our cloud server.
I am copying and pasting my published folder to the server (Location: Local Disk (C:) –> Inetpub –> wwwroot)
Why I am copying my folder to here ? Because IIS server is running on this location and if you want to run website on IIS then site should be here.
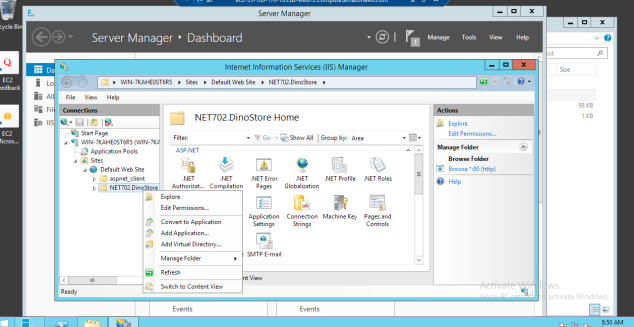
In the Server Manager Dashboard click Tools and select IIS.
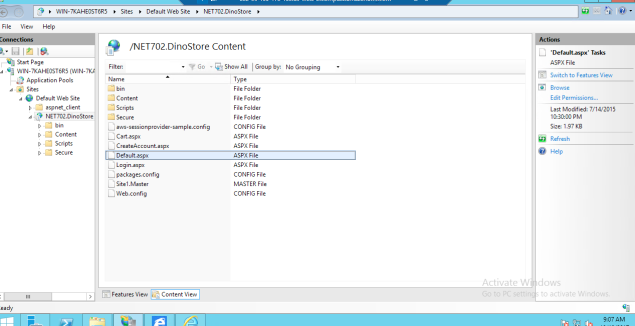
In the left pane (Connections) Select the default web sites and right click on the web folder that I just copied.
Click Convert to Application
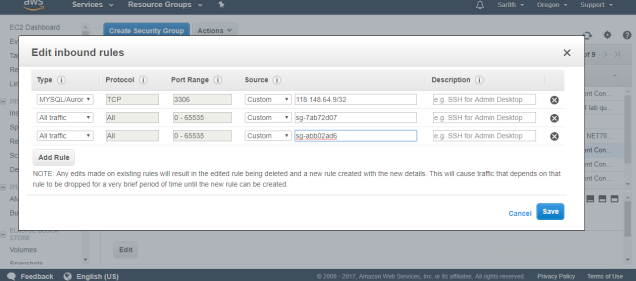
In the AWS security groups I am editing the RDS security rule.
Click the RDS security group and click edit in the inbound rules
I need to add two more rules. I am going to add the security group that is created for the web server and queue server.
Add rule — > All traffic –> copy and paste web server security group name
Add rule –> All traffic –> copy and paste queue server security group name
Click Save
Now go back to the EC2 instances (Web Server) go to the uploaded web application folder and open the Web.config file via notepad.
Remove the access keys and secret keys in the sections of <providers> and <appSettings>
Save the file
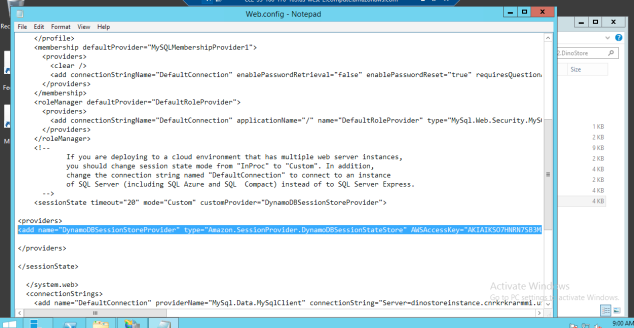
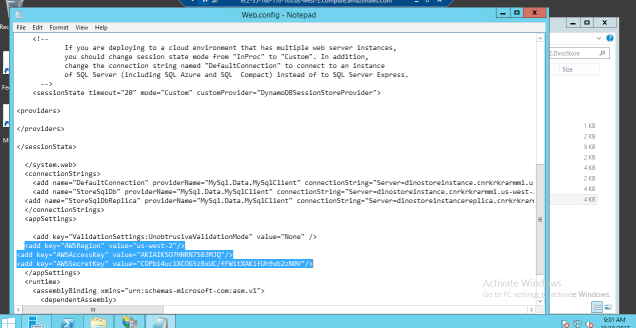
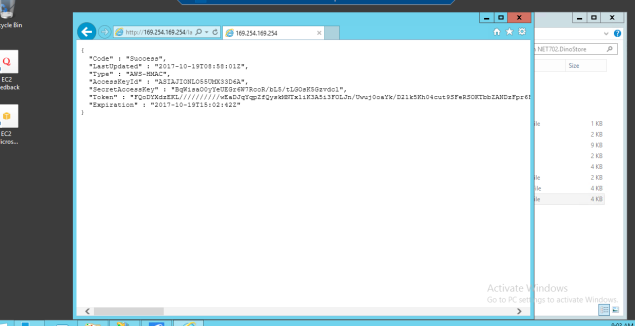
NB: the SDK gets these automatically as part of the role we set up earlier. Open up IE on your server and drop in this URL: http://169.254.169.254/latest/meta-data/iam/security-credentials/WebServerRole
You should see temporary credentials, but these are from the _role_ you created.
Go to the IIS manager and explore the web application and select the Default.aspx file and click Browse.
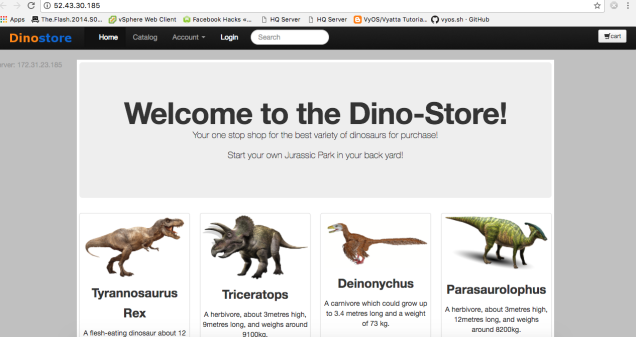
Now you can see the Dino Store website is up and running.

I am going to try to reach web server and see what is happening. So I am going to copy and paste my EC2 web server instance link on my computer browser.
Working fine, I am getting my website thats mean my Instance is working fine as the web server.
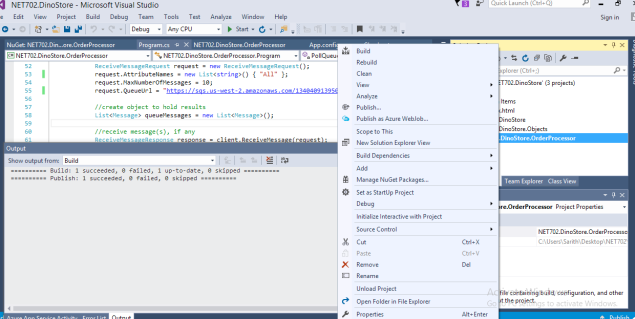
Now we have to publish the DinoStore Oder processing project. To do that,
Right click on the NET702.DinoStore.OderProcessor and click publish
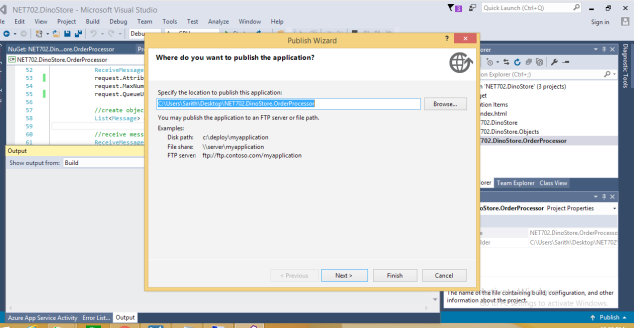
Select the publishing location and click next.
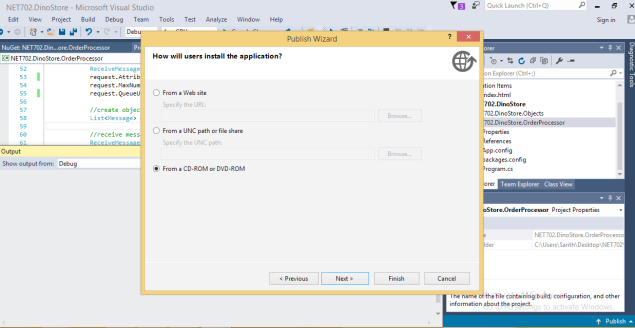
Select – From a CD-ROM or DVD-ROM
Click Finish
So when its done, automatically published folder will be opened. I have to copy this folder to my instance and run the setup.
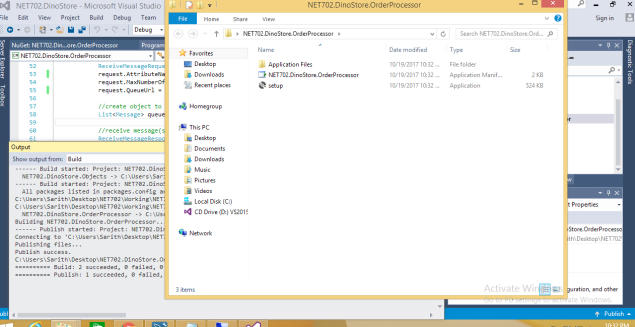
I have copied my publish folder to the Web server.
You can add the setup program file to StartMenu and startup programs as well. Then the program will always run at the startup.
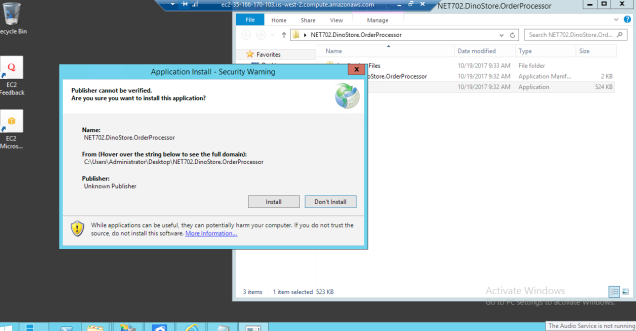
Double click on the setup file and click Install.
After the installation, CMD will prompt for the queue processing.
Now I am running my website and adding some items to the cart and checkout for buying. After I entered all billing and credit card details I am going to check my web server situation.
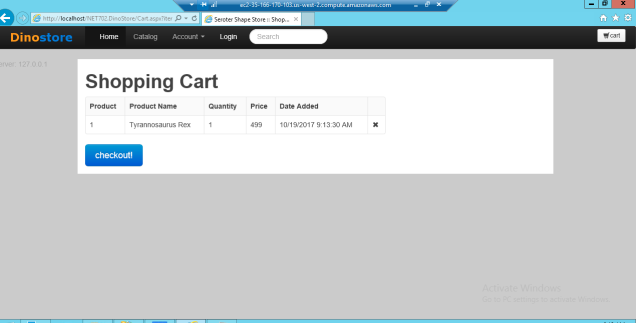
Here it is, Now here I can see one Queue message received and deleted. Thats meant this picked by server and added to the DB.
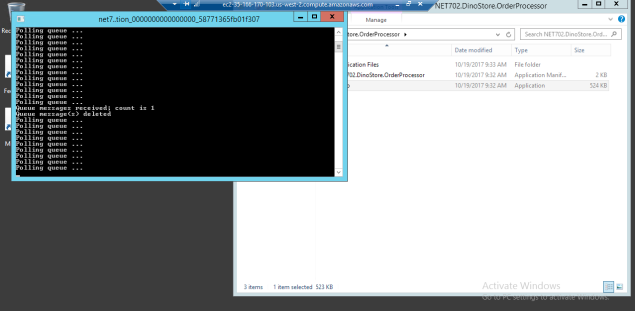
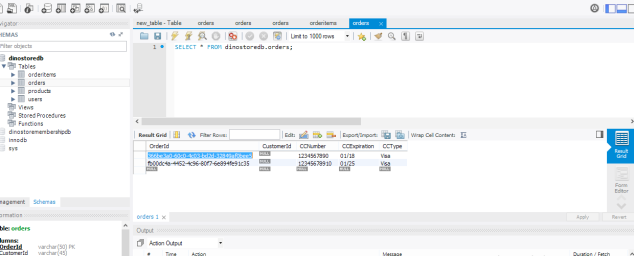
My newly added item is saved on the database now.
This is the end of Lab 5.
Now we have moved our localhost website to the cloud and running it on the cloud using our cloud web server.
- Issues:
When you are published the website project, check all the files and NuGet packages are published properly. Sometime it will not published properly. - Update all NuGet packages that you have installed. Specially DyanamoDBv2.
