Lab 2: Using RDS with ASP.NET Applications
This is the Lab 02. In here we are going to transfer our localhost website to the AWS RDS SQL database and make the replica of that database. Also at the end of the lab we are configuring the web application to read its data from database replication.
Transferring database to AWS RDS
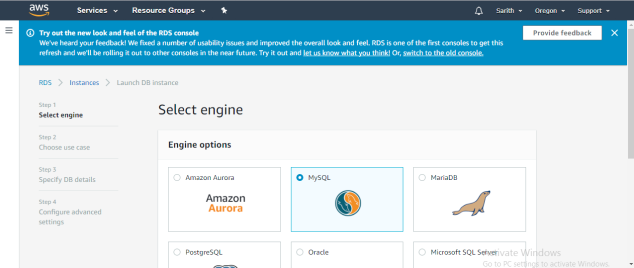
First we have to go to AWS RDS service console. From there select Launch DB Instance. From the first step of that RDS creation wizard select MySQL.
Click Next
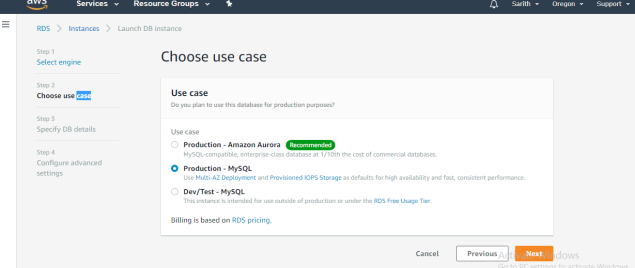
Step 2: Select Dev/Test – MySQL that is under free tier
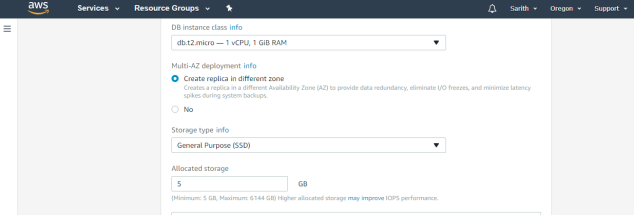
Select DB instance as – t2.micro
Enable “create replica in different zone”
Click Next
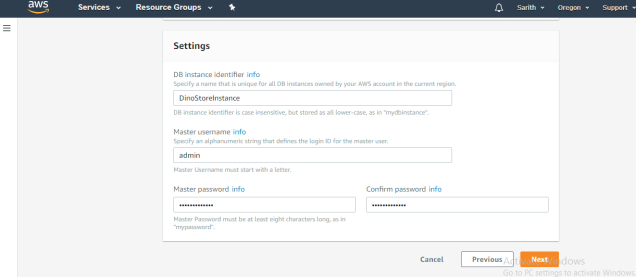
Step 3: Settings
Here I am filling my database instance indentifier name as “DinoStoreInstance”
User name : admin
Password : ******
Click Next
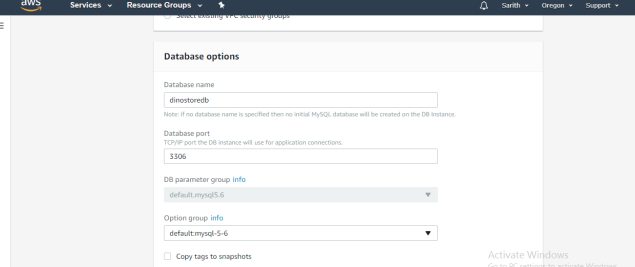
In the database options,
Database name should be our database name. “dinostoredb”
Click Next
After you click next in the previous step you will get the review of settings for you DB instance.
Click Launch DB Instance
Here you can see my DB instance is in creating progress.

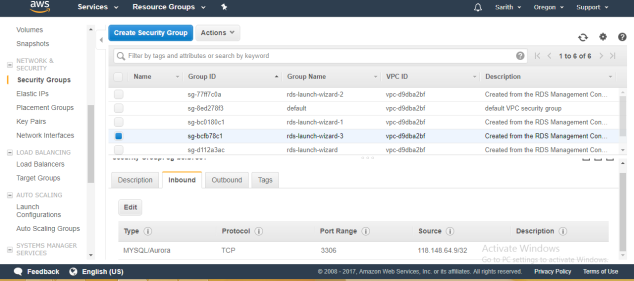
While DB is creating. I have to do some changes in the security policy.
In the security policy I am changing the Source address to myIP. So it will take my machine IP.
Save it
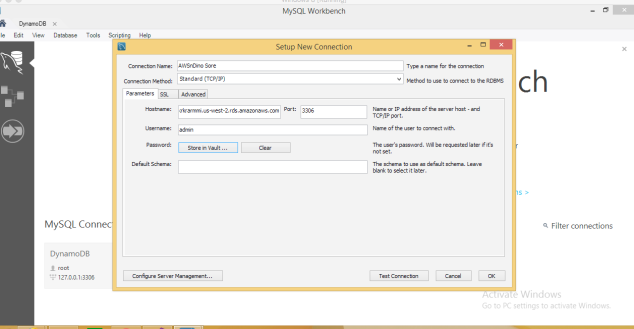
Connecting RDS to MySQL Workbench
Open a new connection in MySQL Workbench and add following details
Connection name : I am putting some easy for me
Hostname : Endpoint of the DB instance
User name : as given before
Password : as given before
Click OK
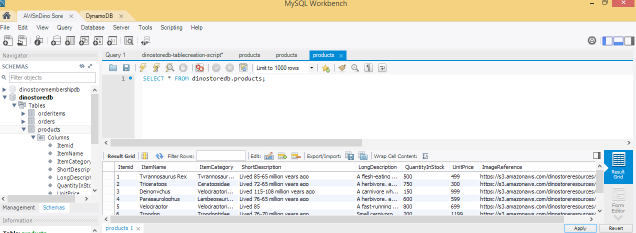
In the database I am running a script to delete my previous localhost database and create a new database in the AWS connection.
After that I have to migrate my data to RDS tables. I have exported CSV file that I have saved.
So I have imported those data to my table.
Click apply to process it.
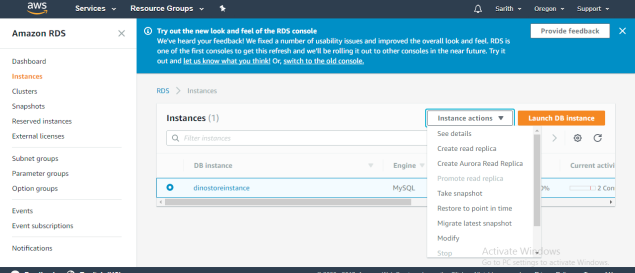
Creating Replica of main RDS
We need to create a replica of my main DB. That is to work as a failover and read my data to the site.
Lets see how we can create a one.
Selected the main DB instance and from Instance Actions drop down list select “Create read replica”
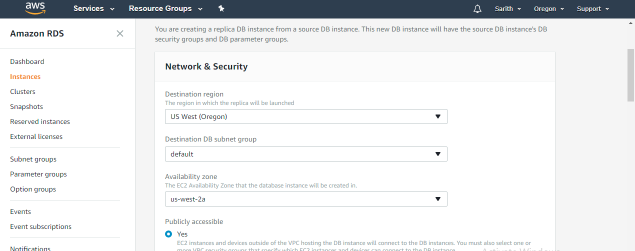
After selecting that it will lead us to the next window to select settings and region.
Keep it in the same region and put the instance identifier name as “DinoStoreInstanceReplica”
Click Next
It will take some time to create the replica and ready both RDS.
Now I have to connect the replica RDS as well to the MySQL workbench to see everything working fine.
So I am following the same procedure I went through to connect the main DB.
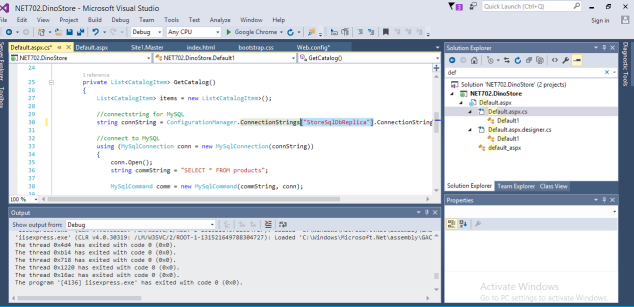
Changing the code
Using visual studio I am changing the SQL connection string Server details and user name and password as well.
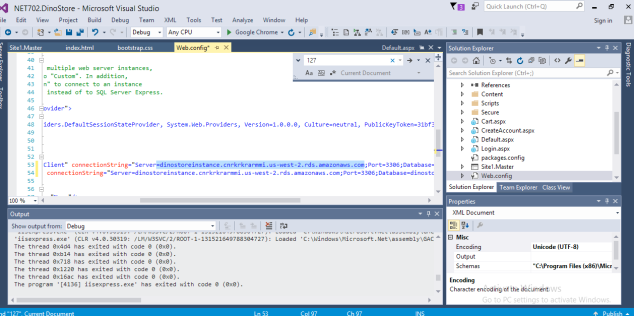
After my SQL connection strings I have added one more connection string for MySQL replica in AWS.
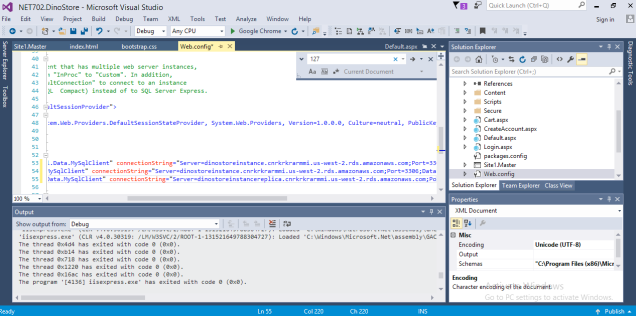
In my database config file MySQL connection instance I am changing the read images to my MySQL replica in AWS.
From that my website load will be divided. Reading will access the RDS replica and writing will access the main RDS.
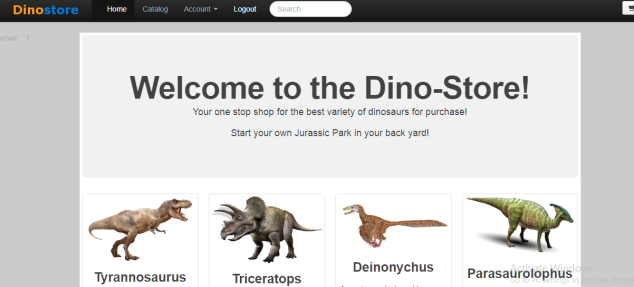
I did run the website from localhost and then here I am trying to create an account here to see whether RDS database writing all information
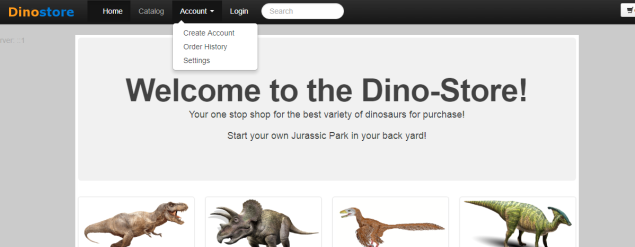
Also you can see my login button changed to logout when I did registered so lets see the database.
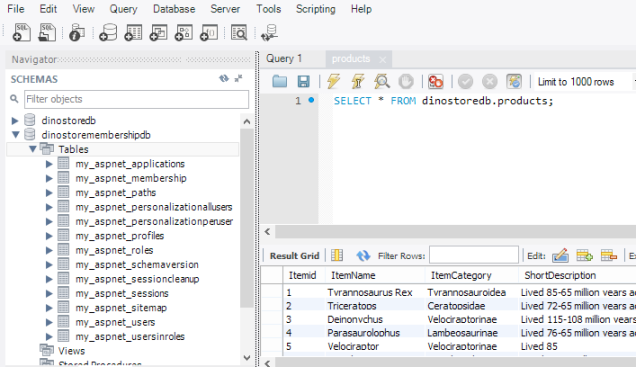
In the AWS RDS I can see all the created table under my dinorstore membership table. Thats mean it success.
I have tried rebooting the main RDS with failover to check whether replica can handle the website and whether login credentials are reading from it. Yes it worked fine. So at the moment my lab steps are doing well.
Note: When you are applying the S3 links of images to the database make sure you give the right link and make sure link is contain the region details as well.
