Lab 9: Enabling Auto Scale to Handle Spikes and Troughs
In the Lab 9 I am going to add a Auto Scale group to main web server.
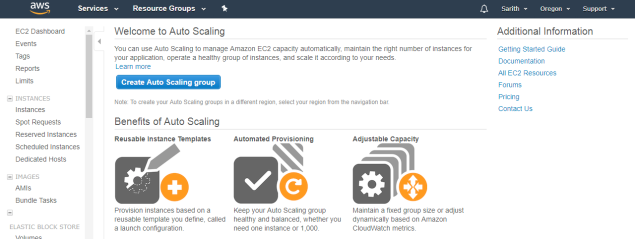
What is Auto Scale?
“Auto Scaling helps you ensure that you have the correct number of Amazon EC2 instances available to handle the load for your application. You create collections of EC2 instances, called Auto Scaling groups. You can specify the minimum number of instances in each Auto Scaling group, and Auto Scaling ensures that your group never goes below this size. You can specify the maximum number of instances in each Auto Scaling group, and Auto Scaling ensures that your group never goes above this size” (Source: AWS, http://docs.aws.amazon.com/autoscaling/latest/userguide/WhatIsAutoScaling.html)
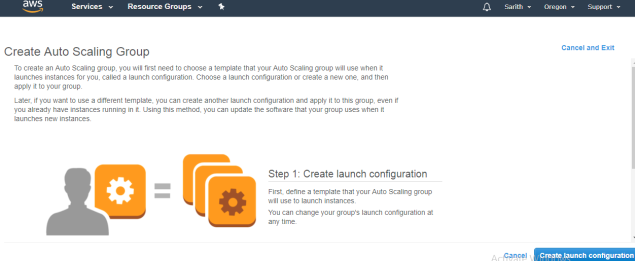
First we have to create a group.
In the EC2 dashboard, left pane click Auto Scale configuration
Then Click Create Auto Scaling group
Click Create Launch configuration
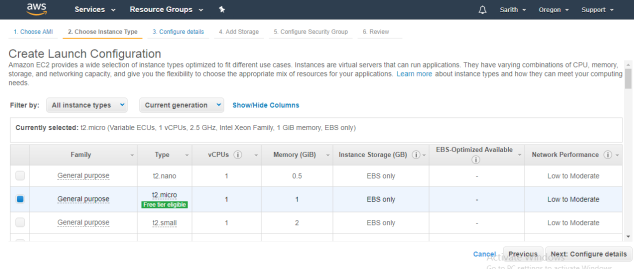
Then you will get the window to select AMIs. Select the web server from my AMIs.

Select t2.micro (free tier)
Click Next
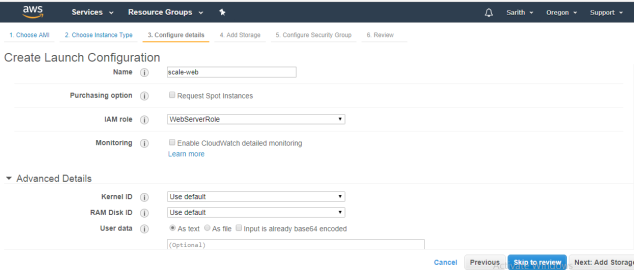
In the configurations.
Name : scale-web
IAM role:WebServerRole
Click Next
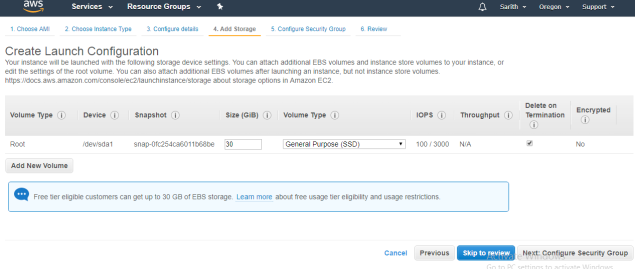
Keep the default storage as we always used.
Click Next
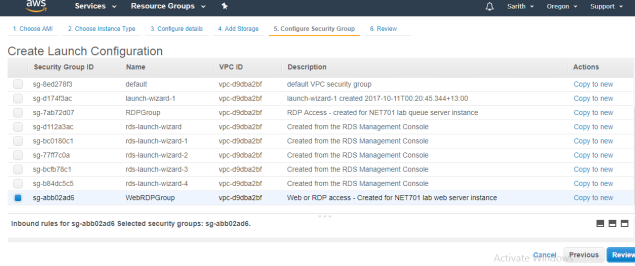
In the security group. Select existing one and choose WebRDPGroup
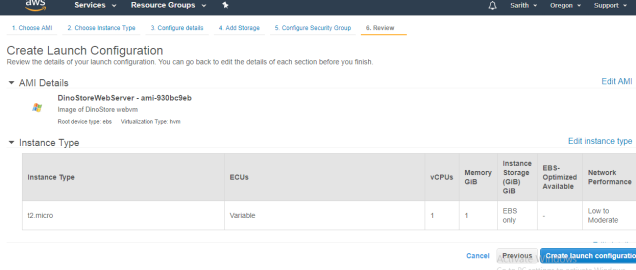
Review the details and click Create launch configuration
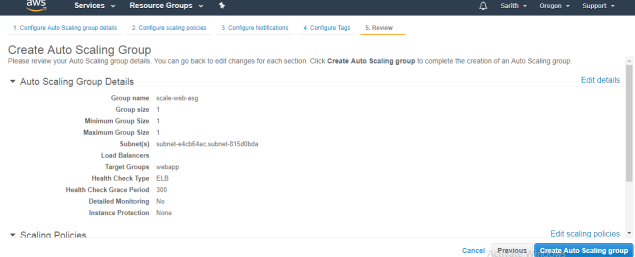
After that it will take you to another step for creating auto scaling group.
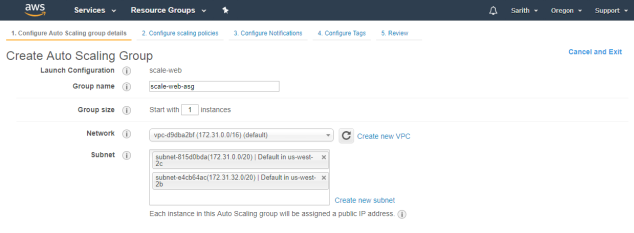
Group Name: scale-web-asg
Subnets : All the subnets
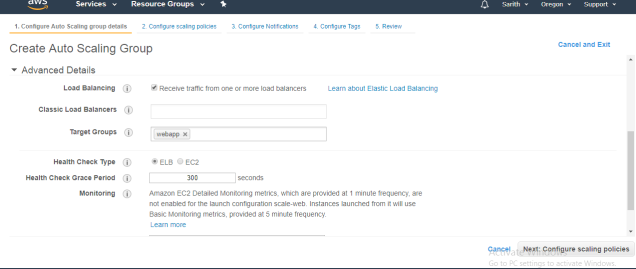
In the advanced settings
Select receive traffic from one or more load balancers
Target Group – Webapp
Health check type – ELB
Click Next
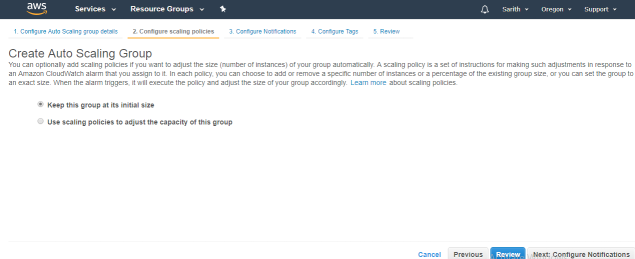
Select, keep this group at its initial size. Because for I don’t need any lower or higher size of my web server.
Click Next
Review and select Create
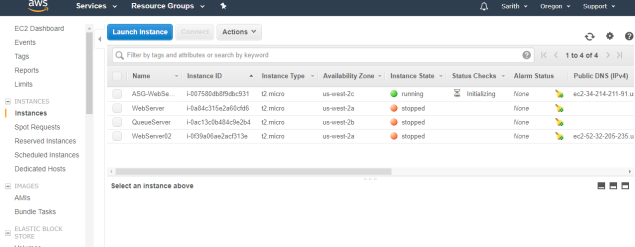
In the EC2 instances area you can see now new instances been created. That is my auto scaling instance.
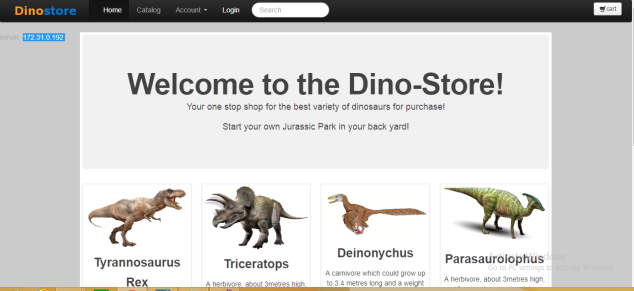
I am going to keep all other instances off and trying to log into my website. Yes I can.
My server IP is – 172.31.0.192
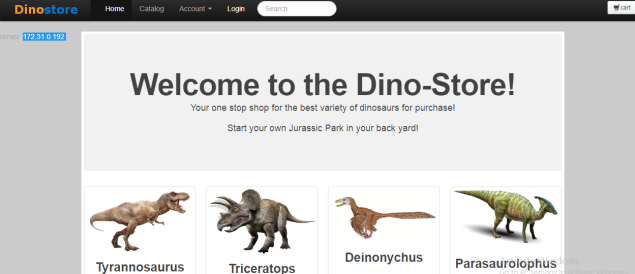
Lets refresh the page after switching on my other servers.
Now IP is 172.31.26.185

Again refreshed, Now IP is 172.31.26.185

I am going to stop the main server and trying now.

Now my IP is 172.31.0.192
That is my auto scale group instance.
This end of the Lab 9.
If you want to stop the auto scaling, then detach the instance from the auto scaling group. Otherwise whenever you turning of the main server, it will create a copy of it.
Note: Do not try to access the website and process a payment when auto scaling instances are running as well with main web server.
When the main web server also running and when auto scaling instance running at same time then when you are trying to access the website or processing the payment it will make a conflict because main server also running and same time copy of the main server is running that auto scaling instance.
Make sure to turn of the auto scaling instance.
